How To Generate a Credit Note
Here is a step-by-step guide on how to create a credit note using CommBilling in Shopify. Note that you will need to be on the C-Business plan to access this feature
Step 1: Set Up Your Credit Note Design and Numbering
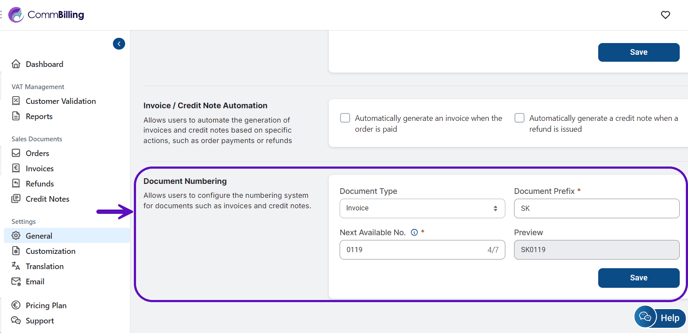
Before you start generating credit notes, you must customize the design and set up the numbering for your credit notes. This customization ensures that all credit notes align with your brand identity and follow a consistent numbering sequence.
- Log in to your Shopify account and go to the "General" tab in CommBilling settings, section Document numbering

- Here in "Document Type" choose "Credit note"

- Define a numbering system for your credit notes. This helps keep track of all credit notes issued and maintains order in your financial records. Press button "Save" to apply it.
Step 2: Generating a Credit Note
There are two ways to generate a credit note in CommBilling Shopify: manually or automatically. Choose the method that best suits your needs.
Automated Method:
To streamline the process, you can enable the automated generation of credit notes. This method saves time and ensures that a credit note is created whenever a refund is processed.
- Go to the CommBilling general settings, section "Invoice / Credit Note Automation"
- Activate the option labeled "Automatically generate a credit note when a refund is issued"

Once this trigger is enabled, credit notes will be automatically generated for every refund processed in your Shopify store.
Manual Method:
If you prefer more control over the process, you can generate credit notes manually. This method allows you to review and customize each credit note before it is issued.
- In CommBilling, navigate to the section "Sales Documents", tab "Refunds"
- Select the order that has been refunded or needs a credit note
- Click on the "Generate Credit Note button". The system will create a credit note

